Agent Chat
With a private one-to-one agent chat in your event, the attendees have the opportunity to chat with your teams. This guide will explain how to moderate the agent chat and it’s functions.
Login
The staff who moderate the agent chat are called Agents. Each Agent will receive a link that gives them access to the admin page, from where you moderate the agent chat. Each link is unique and personal, therefore several agents can’t use the same link at the same time. If there are several agents, each agent should receive one link each. There is no limit to the amount of agents in a team, usually there is around 3 agents who handle the chats.
Overview
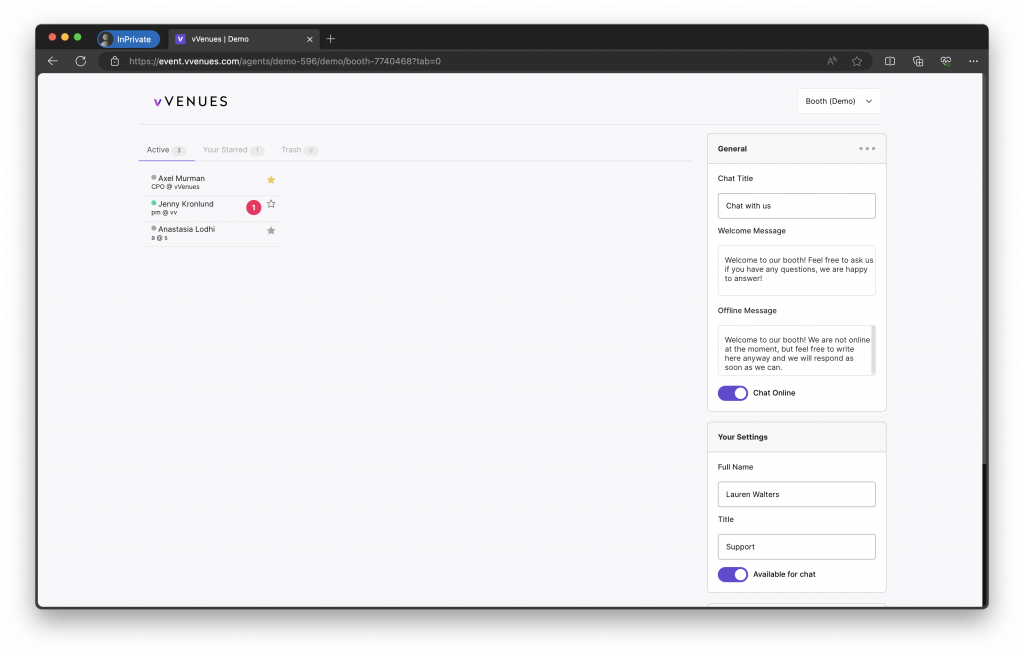
Above you see the overview of the admin page.
Everyone that visits your chat will appear in the tab ”Active”, from there you can start interacting and answer messages from the visitors. To the left of each person there is a colored circle, if the circle is green it means that the person is online in the chat. If it is grey, the person has left the chat. An attendee automatically goes online when they visit a view, in the event, that contains a chat.
A red notification next to the name in the list, together with a sound, indicates that you have received a new message. (See picture below). All agents are able to see the chats that are active, so if you get a question that you don’t have the answer to just contact your colleague and they can continue the conversation.
States
Next to each name there is a star icon that indicates the status of that chat.

Yellow star: You have answered or star marked the message to indicate to your agent colleagues that you will take action on that specific message. You mark a message by pressing the star, and it will change to a yellow color. You can filter these messages by clicking on “show starred”.
Empty star: No agent has answered or marked this message.
Grey star: One of your agent colleagues has answered or marked this message.
Settings
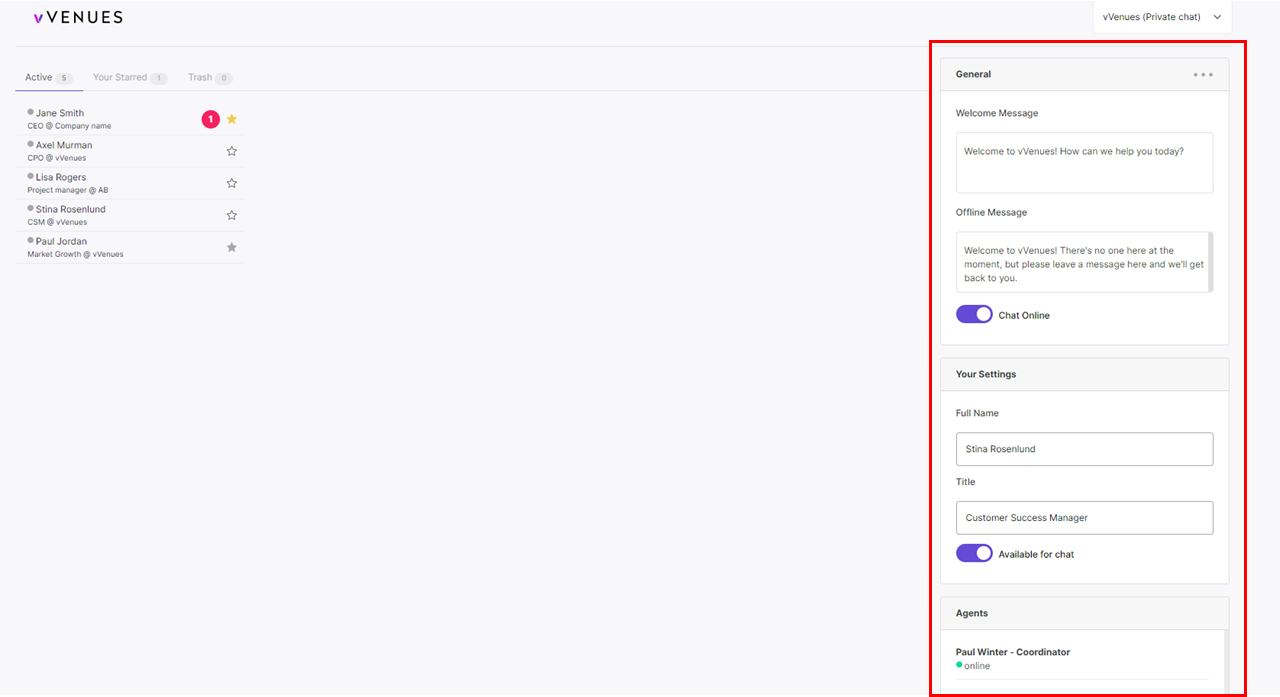
General settings
Chat Title: Set the title for the chat, this will appear in the bottom of the screen for the attendee. Ex “Chat with us”, “Ask a Question”
Welcome message: Set a default welcome message. This message will popup when an attendee visits the view that contains your chat. Note that attendee that has a already received a welcome message will not see any updated welcome message if you choose to change the message during the event. Therefore it’s great to choose a welcome message before the event starts.
Offline message: Set an offline message when none of the agents are available to chat. Apply the offline message by enabling the “Available for chat” setting. Important: The “available for chat” applies to the whole team, this should only be enable when no one in your agent teams is available.
Select View: If your agent team is within multiple views you can switch between them by using the list in the top right corner.
Your settings
Full name: Name of the agent. (The name will be visible in the chat when the agent write to an attendee)
Title: The title of the agent (visible in the chat).
Agents: Your agent colleagues and their status, if they are online or not.
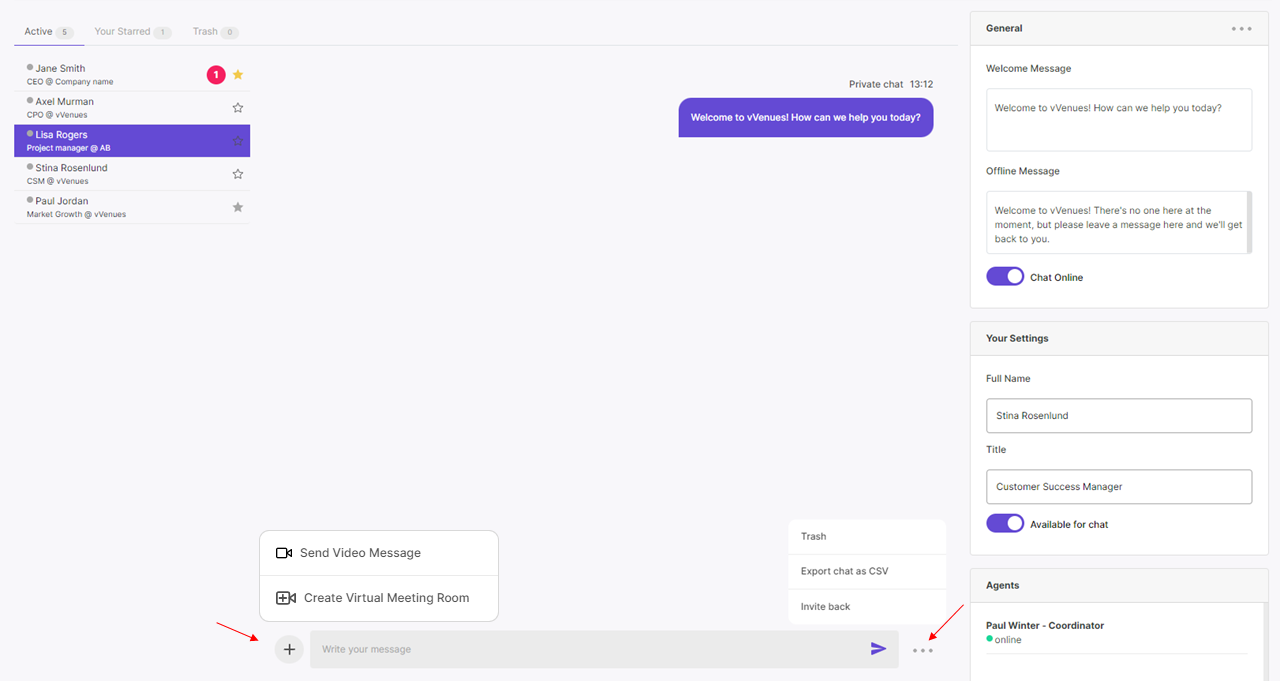
Delete Chat
Click on the three dots (right to the message area) on the selected chat and choose Thrash. The deleted chats will be filtered in the “trash” tab. You are always able to bring them back by doing the same procedure but choose “restore”.
Export Chat
Click on the three dots (right to the message area) on the selected chat and choose Export chat as CSV to export. If you want to export all chats, click on the tree dots in the top right corner and choose Export all chats.
Invite Back
When the visitor leaves the view, the chat will disappear from their screen. But the conversation will be saved if they visit the page again.
The chat agent also has the ability to invite the visitor back to continue the chat. The visitor then gets a notification on their screen with an option to join, if they press “join” they automatically navigate back to the chat.
Create a virtual meeting room
Click on the plus icon to the left to invite the person into a video meeting.
Send a video message
Click on the plus icon to the left to record a video message and send it in the chat.
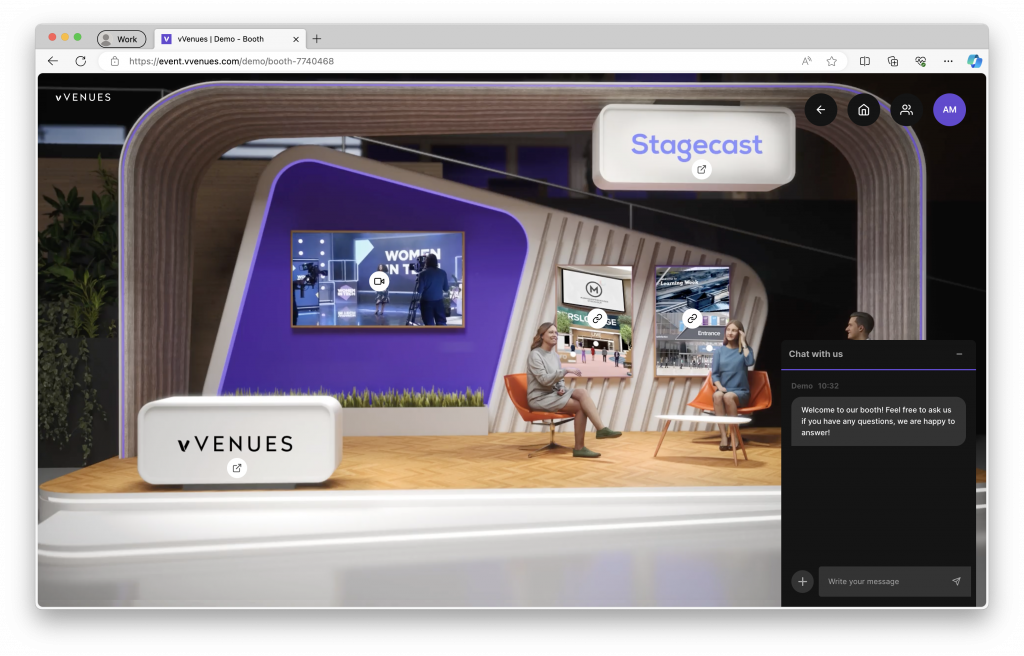
View for the Attendee
When a attendee enters your view the chat will pop up with the welcome message. If there is no welcome message added to your chat, the chat will be minimized and placed in a tab in the lower right corner.
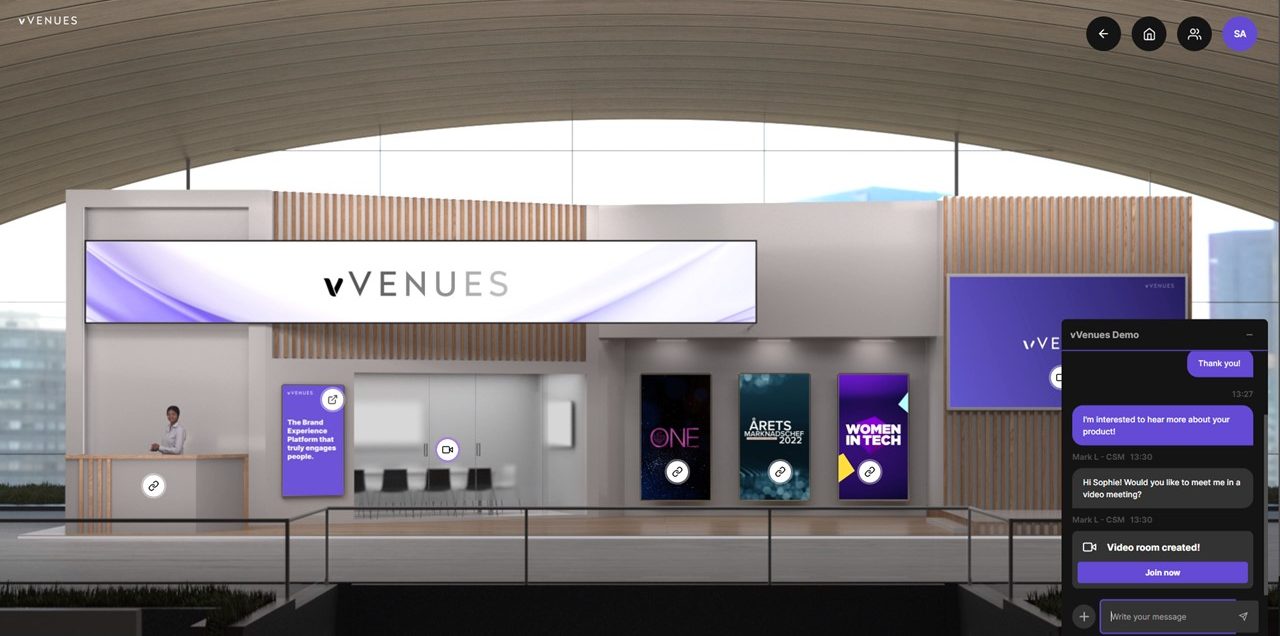
The visitor will be noticed with a sound when they receive a message. Both the event visitor and the chat agent have the ability to invite each other to video calls. You send an invitation by pressing the plus icon and press “Create virtual meeting room”. To enter the video meeting, both of you needs to accept the invitation by pressing “Join now”.